DIY Wall Panels for Vertical Gardens: Custom Solutions on a Budget
I remember when my kitchen wall changed from plain to a colorful, living space. Making my first DIY vertical garden opened a new world. It showed me how creativity and practicality can meet.
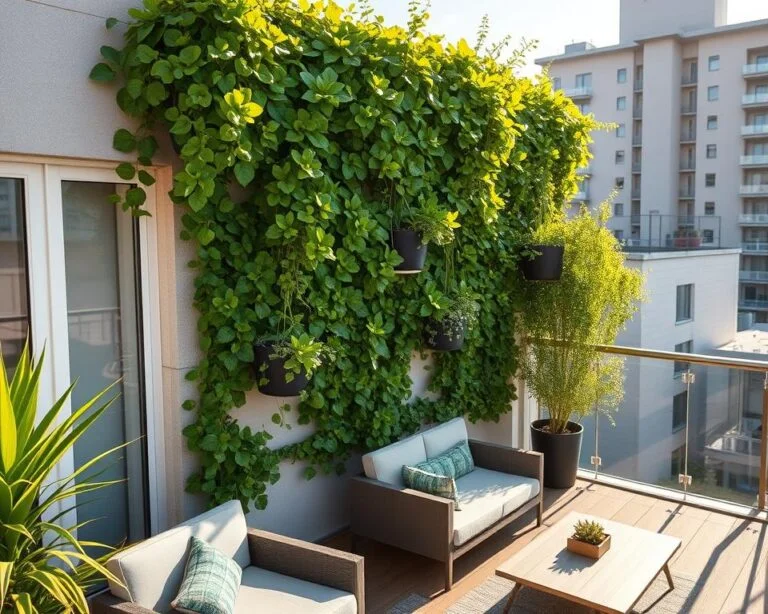
Vertical gardens are more than just looks. They bring nature inside and use space well. With affordable DIY wall panels, any wall can become a green oasis. Imagine picking fresh herbs right next to where you cook or adding a beautiful green spot to your home.
Custom vertical garden wall panels can change any space. They work in small kitchens or big homes. These solutions let you grow plants in places you never thought possible, all while saving money.
Key Takeaways
- DIY wall panels can be created for less than $5
- Vertical gardens maximize limited urban space
- Custom designs allow for personal creativity
- Herb gardens can be integrated into kitchen decor
- Budget-friendly materials can be easily sourced
Understanding Vertical Garden Wall Panels
Vertical gardens have changed city living, turning empty walls into lively spaces. They’re not just pretty; they’re a smart choice for small homes.
Vertical gardens are a hit in cities, bringing nature into tight spaces. These 3D art pieces are not just eye-catching. They also make your home healthier.
Benefits of Vertical Garden Systems
Vertical gardens do more than look good. They’re great for the environment and your health:
- Improve air quality by absorbing carbon dioxide
- Reduce indoor temperatures naturally
- Lower stress levels and enhance mental well-being
- Create accent walls with living, breathing design
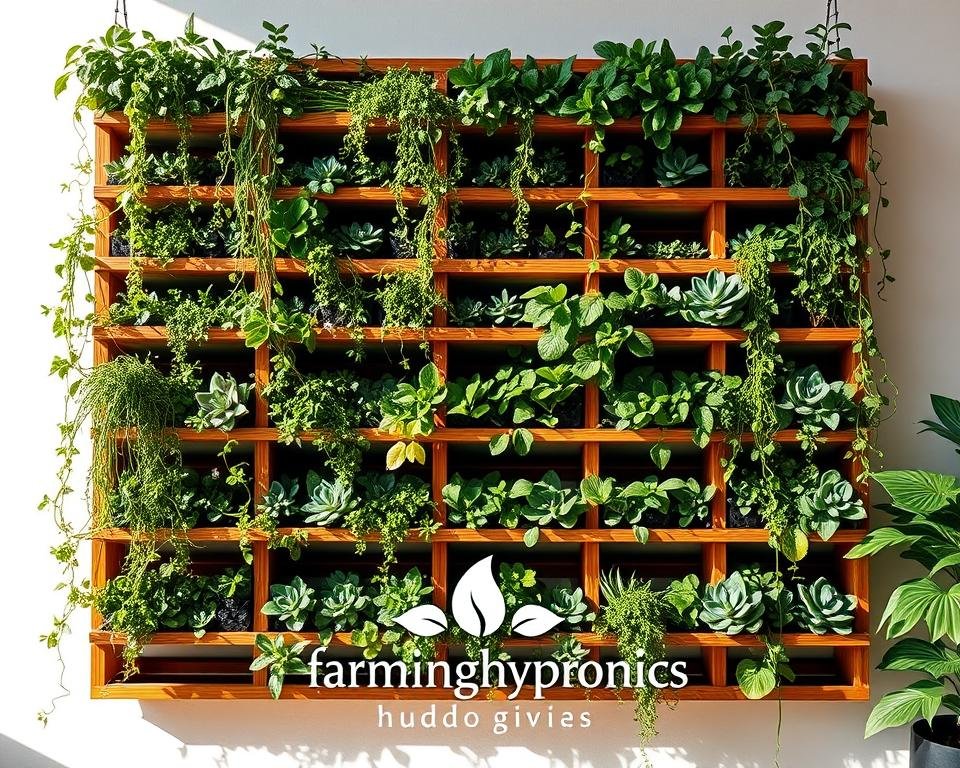
Types of Wall Panels for Plant Growth
Not all vertical gardens are the same. Each type meets different needs and spaces:
| Panel Type | Best For | Maintenance Level |
|---|---|---|
| Hydroponic Panels | Space-efficient growing | Medium |
| Modular Plastic Units | Flexible design | Low |
| Fabric Pocket Systems | Lightweight installations | High |
Space-Saving Advantages for Urban Homes
For city folks, vertical gardens are a big deal. They turn empty walls into green spaces, making the most of your home. Whether you live in a small flat or a cozy loft, these panels bring nature inside.
Essential Materials and Tools for DIY Wall Panels

Creating stunning wall decor with vertical garden panels requires careful selection of materials and tools. Your project success depends on choosing the right supplies. These will transform plain walls into textured walls with functional plant holders.
For your wall cladding project, you’ll need a comprehensive toolkit. It should combine precision and versatility. Professional DIY enthusiasts recommend gathering the following essential:
- 1″x8″x8′ Common board for structural support
- 1″x2″x8′ Common board for framing
- Waterproof food-safe plastic liner
- Burlap for natural texture
- 1.5″ Kreg pocket hole screws
- Wood stain for finishing
- High-quality garden soil
Your tool arsenal should include professional-grade equipment. This ensures precision and efficiency:
- RYOBI Airstrike Nailer for secure attachments
- RYOBI 12″ Sliding Miter Saw for accurate cuts
- RYOBI 18V Cordless Drill/Driver for versatile drilling
- Kreg Jig for creating perfect pocket holes
Pro tip: Invest in quality tools for a smoother and more enjoyable project. With the right materials and equipment, you’ll create a stunning vertical garden. It will add both beauty and functionality to your living space.
70% of DIY enthusiasts prefer MDF for its affordability and ease of use in wall paneling projects.
Custom Design Ideas and Planning
Creating a vertical garden needs careful planning and creative design. Your home renovation can turn ordinary walls into living spaces. The goal is to design wall panels that look great and match your decor.

When designing your vertical garden, several key points will help you succeed:
Measuring and Layout Considerations
Getting precise measurements is key for a good vertical garden. Here are important steps:
- Measure wall dimensions accurately
- Assess natural light exposure
- Evaluate structural wall strength
- Plan for potential water drainage
Design Styles and Aesthetic Options
Vertical garden wall panels offer a lot of design flexibility. Recent trends include:
- Minimalist geometric patterns
- Rustic reclaimed wood designs
- Modern modular panel systems
- Coastal-inspired white paneling
“Design is not just what it looks like and feels like. Design is how it works.” – Steve Jobs
Waterproofing and Drainage Solutions
Keeping your walls safe during a vertical garden project is crucial. Strategic waterproofing prevents moisture damage and ensures success. Use waterproof membranes and drainage systems to keep water away from walls.
Custom wall paneling can boost your home’s value by up to 15%. With good planning and execution, your vertical garden wall panels will be a stunning feature in your home.
Step-by-Step Construction Guide

To make custom DIY wall panels for your vertical garden, you need to plan well and execute with care. First, get all the tools and materials ready. This will make the installation process easier.
Begin by setting up your workspace and preparing the wall. Check the wall for any damage or issues that could impact the panel’s installation. Clean the wall well, removing dust, wallpaper, or debris. This step is crucial for a smooth base for your project.
- Measure the wall area carefully, accounting for windows and fixtures
- Calculate square meterage by multiplying wall width and height
- Select appropriate materials for your DIY wall panels
Make sure you have the right tools for a successful installation:
- Tape measure
- Pencil
- Spirit level
- Precision drill
- Electric saw or jigsaw
- Adhesive gun
- Screws
- Hammer
When cutting panels, use a fine-tooth saw blade to avoid splintering. Pro tip: Add about 1/4 inch when cutting around outlets or fixtures for a flush fit. Also, leave a small 1/16 inch gap for expansion to prevent warping or buckling.
For mounting, use two to three screws per panel for a firm hold. If you’re working with brick walls, it’s wise to get a professional electrician’s help for safe and proper installation.
Remember, patience and precision are key to creating stunning DIY wall panels that transform your space.
After installing, use wood filler or caulk to fill any gaps. This will give your wall a seamless and professional finish. Let the treatments dry completely before adding the final touches to your custom vertical garden wall.
Plant Selection and Maintenance Tips
Creating a stunning vertical garden needs careful plant selection and maintenance. Your decorative wall panels can become living artwork with the right plants and care. Indoor spaces do well with plants like ferns, peace lilies, and spider plants that love low light.
For a successful vertical garden, choose plants with shallow roots. Outdoor walls can have a mix of evergreen species, native plants, and succulents based on your climate. Modular systems make it easy to replace plants that don’t fit well.
Watering your vertical garden needs to be precise. Small walls might use manual watering, while big ones need built-in systems. Smart irrigation can water plants based on their needs and the environment. A moisture meter helps keep your garden healthy and green.
Regular care is key for a long-lasting garden. Check for pests and replace soil as needed. Indoor gardens need soil replacement every two years, and outdoor ones might need it annually. With the right care, your vertical garden can also improve the air quality in your home.